Do It Yourself (D.I.Y.)
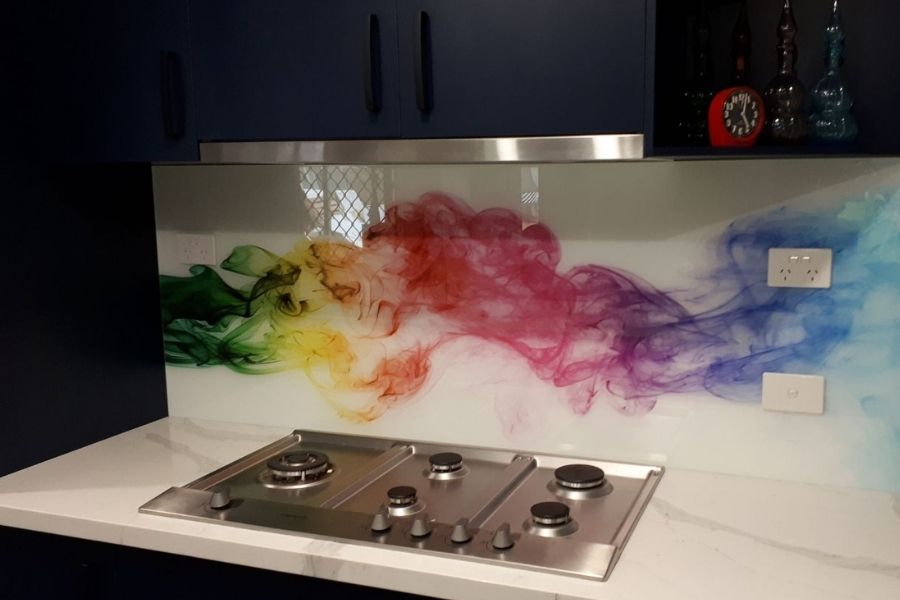
We offer a great discount for our Do It Yourself (D.I.Y.) splashbacks and shower screens.
All we require is a drawing of your specifications, and you can leave the rest to us. Come into our showroom to select your splashback colour, or we can advise on a colour based on your kitchen/laundry palette.
How to measure a Splashback
- Using a Spirit Level, check all benchtops and any overhead cupboards are level (you may have to make adjustments later).
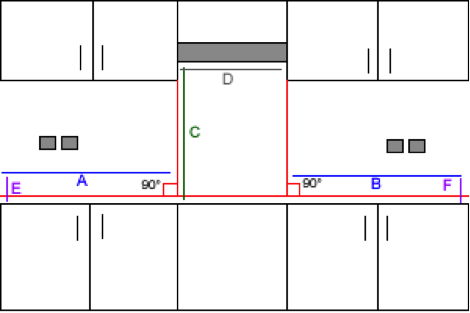
Widths A and B are the width from the wall to the stovetop splashback line, minus 3mm - Height C is the distance 3mm above the benchtop, minus 3mm where it will meet the rangehood.
- Width D is from the 2 units either side of the rangehood, minus 3mm for each unit (so the full width minus 6mm). If your stovetop splashback lines are marked from the edge of the units, it will need to be moved in 2mm each side).

- Heights E and F are the height you wish your upstands to come to, from the horizontal line marked 3mm above the worktop. If you are going full height to your overhead cupboards, you need to take an extra 3mm off each, where they meet the units.
- If two splashbacks or upstands meet at a corner, then ensure you also allow an additional 8mm for glass thickness and adhesive depth, for one of the pieces (so if 2 pieces meet at a corner, one piece should stop 10-11mm short of the wall to allow for the other piece, and an expansion gap- the other piece should be the full distance to the wall minus 2-3mm).
- Next to measure are the power points. Always measure to the centre of each powerpoint. Typically, a cut out of 60×100 is sufficient. But please do check that the powerpoint will cover the hole in glass.
How to install a Splashback
- Make sure all power points are removed before installation.
- Next is to silicone the wall. Squeeze silicone in even vertical lines across the length of wall.
Simply press the glass against the wall and apply pressure over the entire surface of the glass. If at any point the glass feels a little ‘bouncy’ when pressed against the wall, then pull it back off and add more silicone at that point. Put the glass back on the wall and test it again. If there is still a bit of movement, then repeat the process until the entire panel feels solid on the wall. - Once the glass is fitted please leave it for at least 24 hours before removing the tile spacers, or wiping the glass vigorously. Once the spacers are removed you are now ready to seal the glass splashbacks. We recommend that a clear neutral cure silicone is used for this as we believe it leaves the tidiest finish.
- Run a bead of clear silicone along the bottom of the glass (where it meets the worktop) and where two panels meet. Use warm soapy water and squirt it on the silicone, then wipe the excess off with a spatula. Try not to smear too much over the face of the glass. It is important the splashbacks are well sealed, especially in areas where they are likely to be splashed with water etc.
